Warhounds Steel Sails: Engine Room and Ship Console
Finish the Steel Sails engine room, activate the ship console, rescue downed soldiers and prepare for your first base decisions in Warhounds.
How to finish the engine-room objective
Regroup before entering the engine room, clear the enemies, then move an operative onto the yellow interaction tile at the console. In our successful attempt, moving MayB onto that tile started the console dialogue and led to the strategic map with all four soldiers still in the roster.
This guide covers the engine-room finish and rescue examples from our run. For the earlier tutorial and campaign objectives, see first session and mission types and objectives.
Preserve all four soldiers
The objectives in our run were Destroy all enemies, All squad soldiers must survive, and later Hijack the ship. A soldier showing NEED HELP could still be rescued. Try to help quickly and protect them from further attacks, even if the downed timer has time left.
Our first attempt failed on the squad-survival objective after entering the room. Fidget had reached the doorway with no AP left. For the retry, we gathered Simba, MayB, Fidget and Crow outside the closed door with 2 AP each, giving us more actions available when the fight began. MayB and Fidget still had only 1 HP, so the squad needed careful positioning as well as available AP.
The failure screen’s 14 turns made was a result statistic, not a stated fourteen-turn deadline.
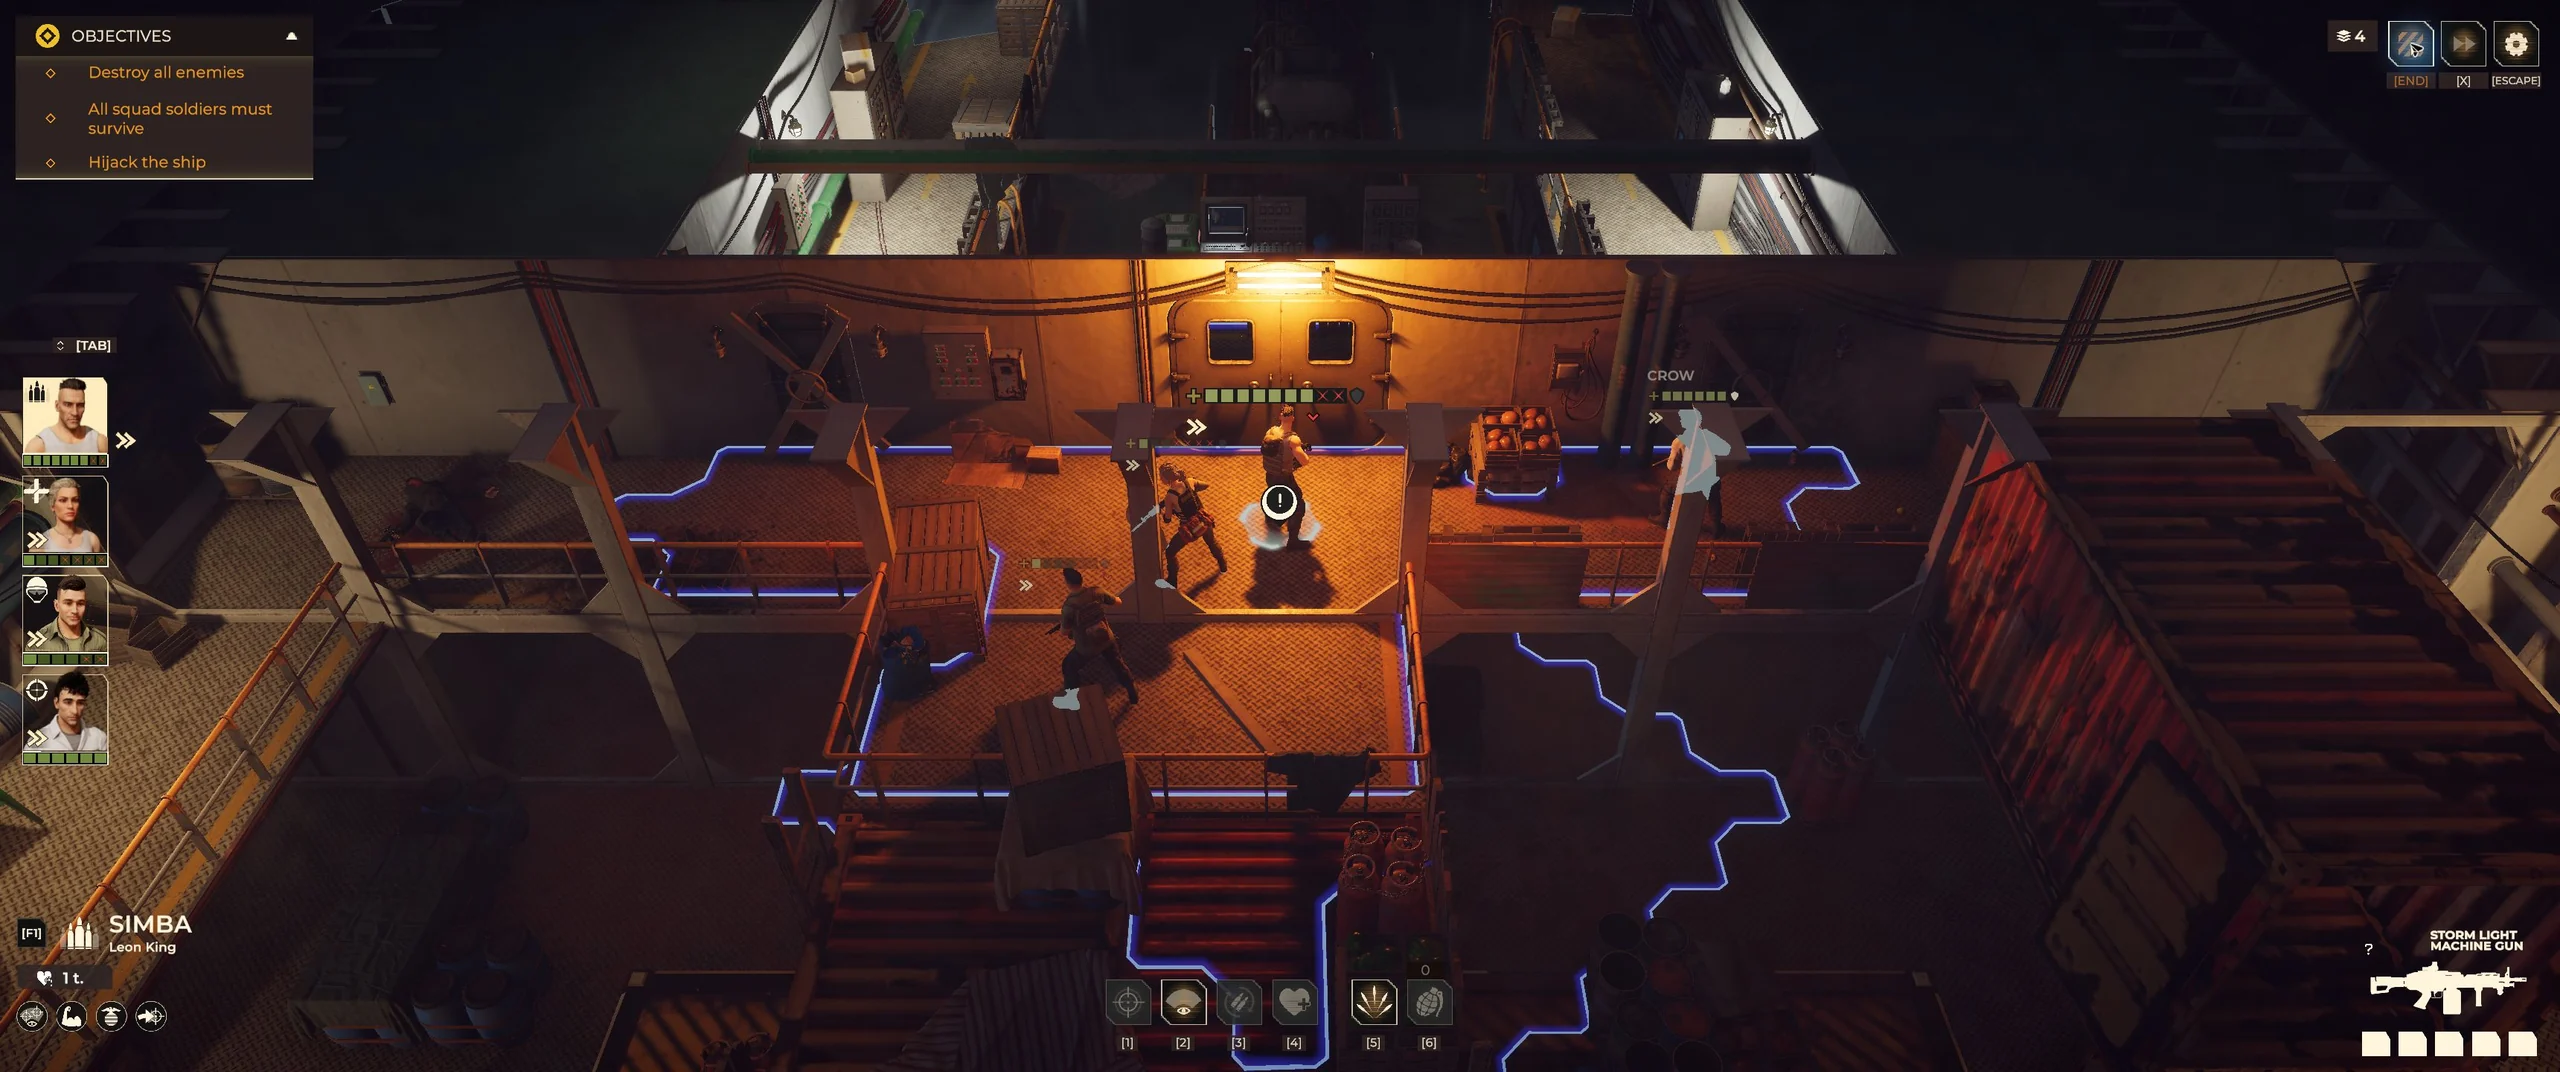
All four soldiers have actions available outside the door, but MayB and Fidget are badly hurt. Open for a larger view.
Use the correct rescue action
Check which rescue action the selected soldier has. MayB’s Resuscitation preview described restoring 50% HP and granting 1 AP, for a 1 AP cost. In our example, Simba stood up with 3 HP and 1 AP, while MayB went from 2 AP to 1. See MayB’s rescue example for the before-and-after screenshots.
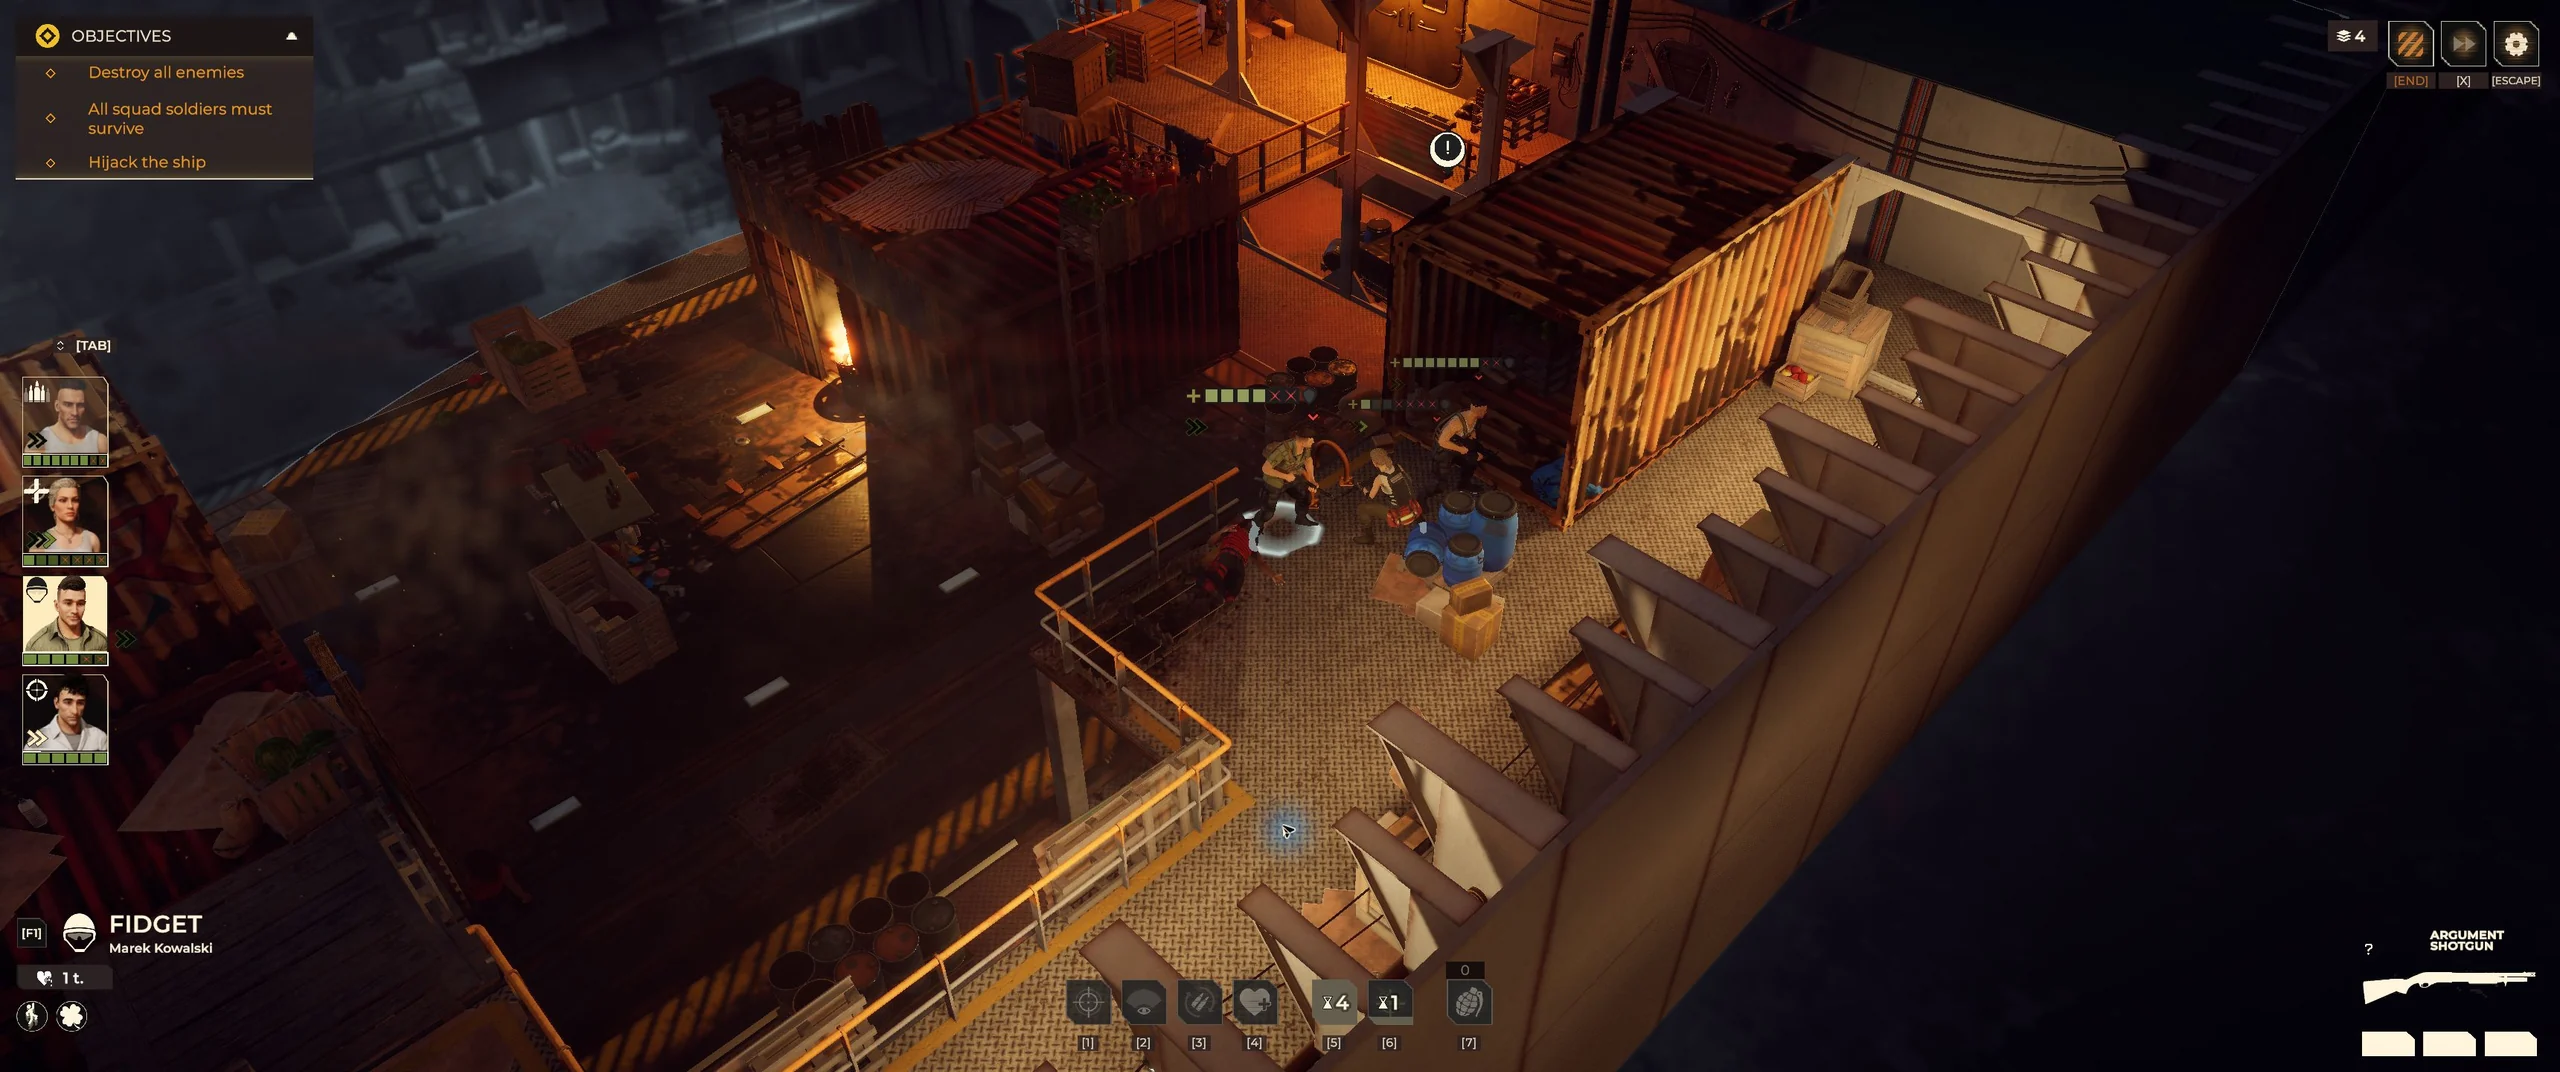
Fidget’s First Aid described 1 HP and 1 MP. When MayB was down on an upper platform, we reloaded Fidget and found no available First Aid target. After using Sprint for an MP, we reopened First Aid, selected MayB and confirmed. Fidget moved and climbed to her automatically. She stood up with 1 HP and a green movement indicator; Fidget had spent his remaining ordinary AP.
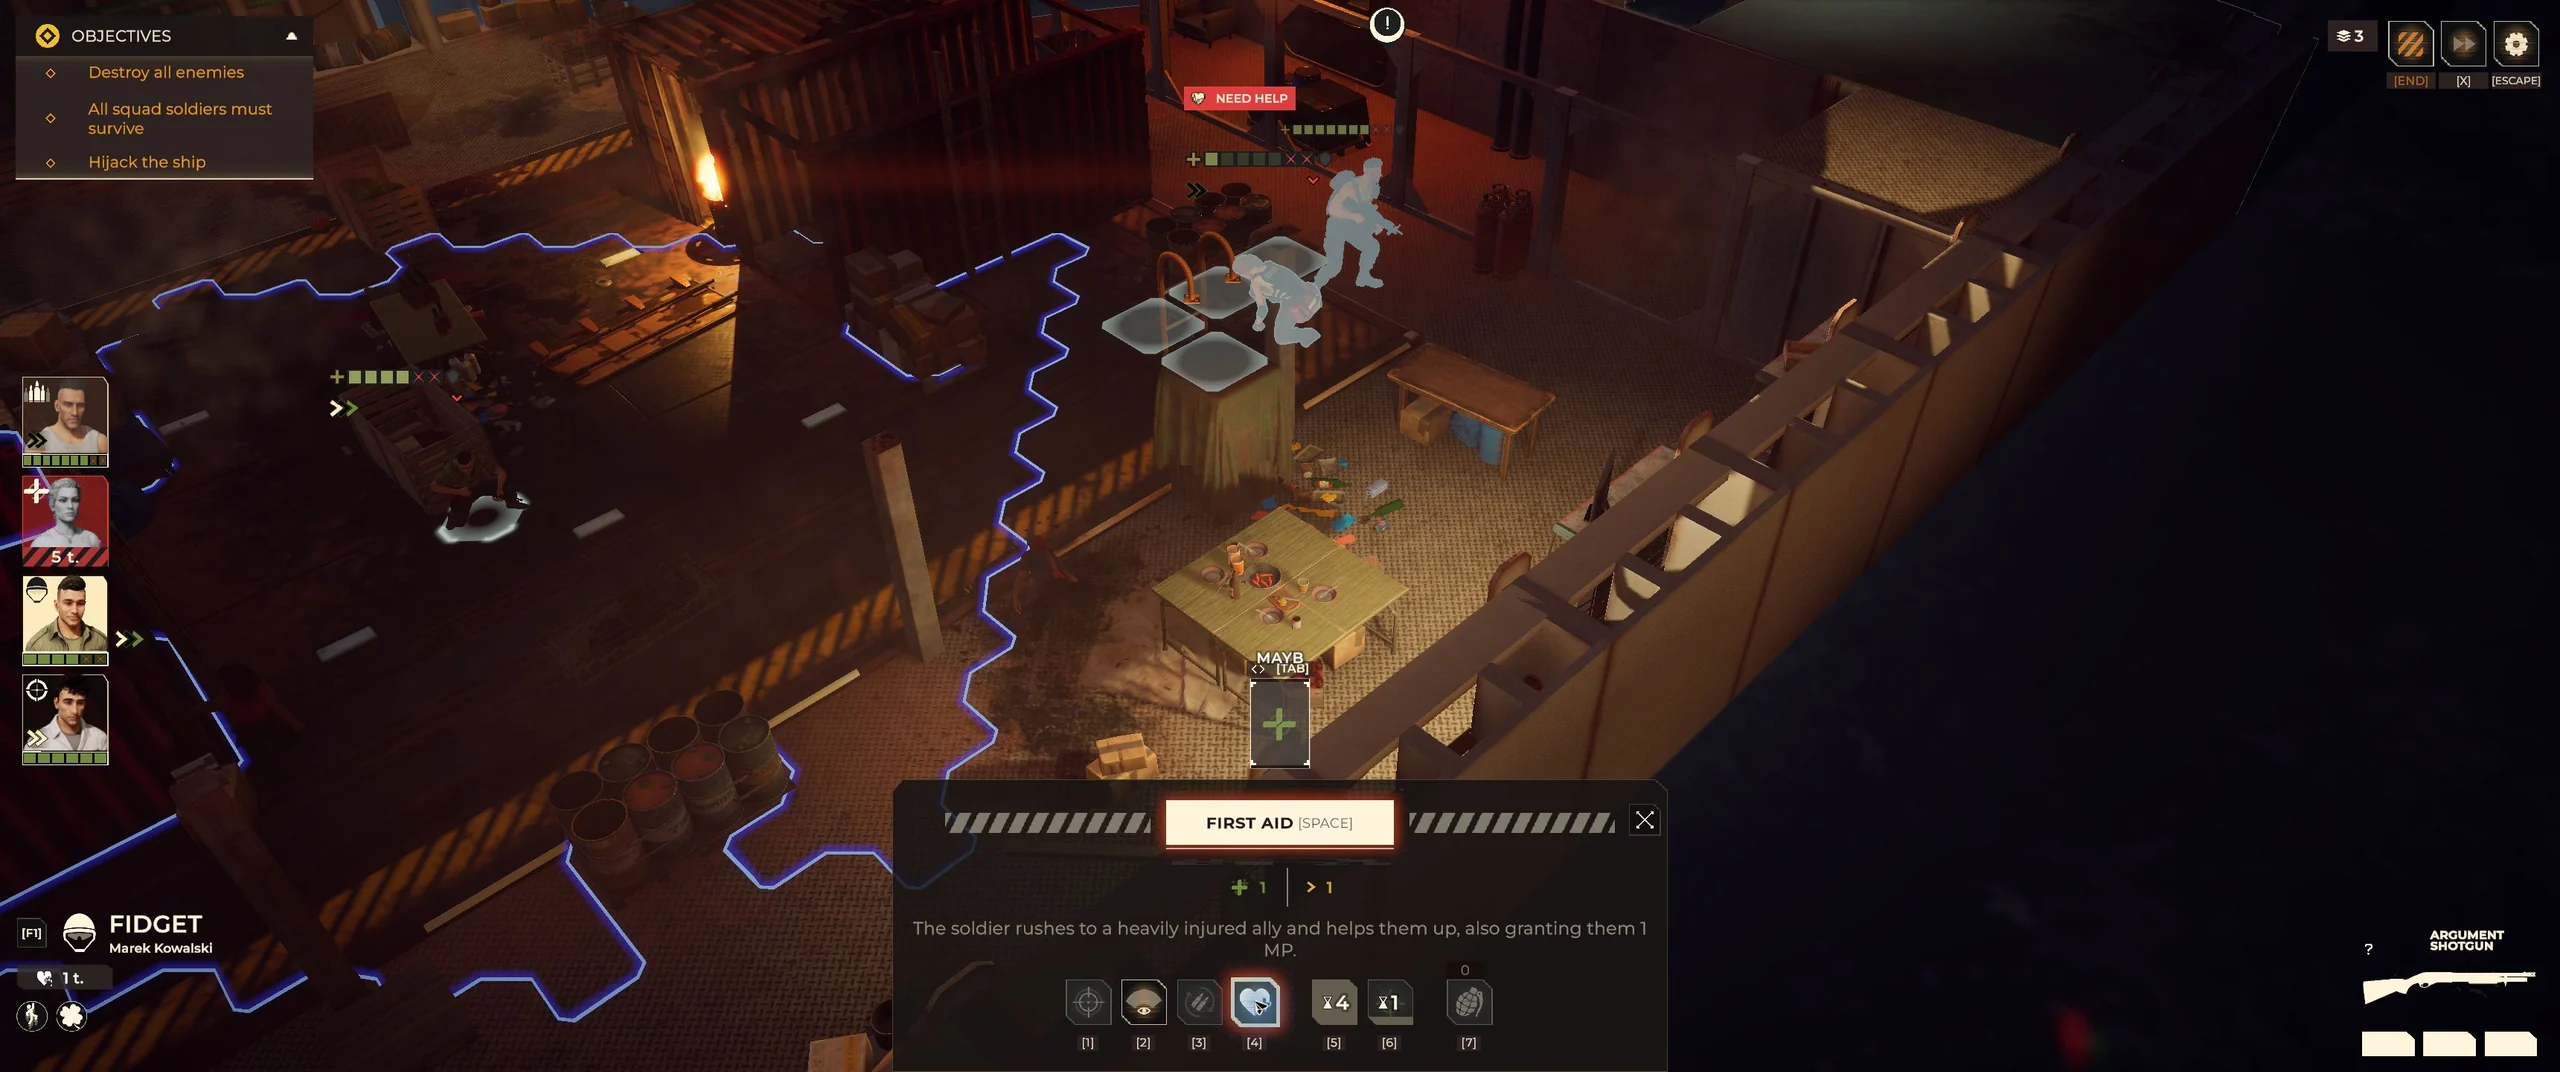
MayB is available as a First Aid target after Fidget uses Sprint in this rescue. Open for a larger view.
The rescue result shows MayB standing again. Check the available targets in your own action panel: Sprint worked in this situation, but has not been shown to make every downed ally reachable. MP is for movement; do not count it as an extra shot.
Massive Fire: a cover-breaking example
In this tutorial encounter, Simba used Massive Fire against enemies behind wooden boxes. The attack left two foreground enemies down and destroyed their cover. The rear enemy survived with 4 HP, and Simba had 1 AP left after starting with two.
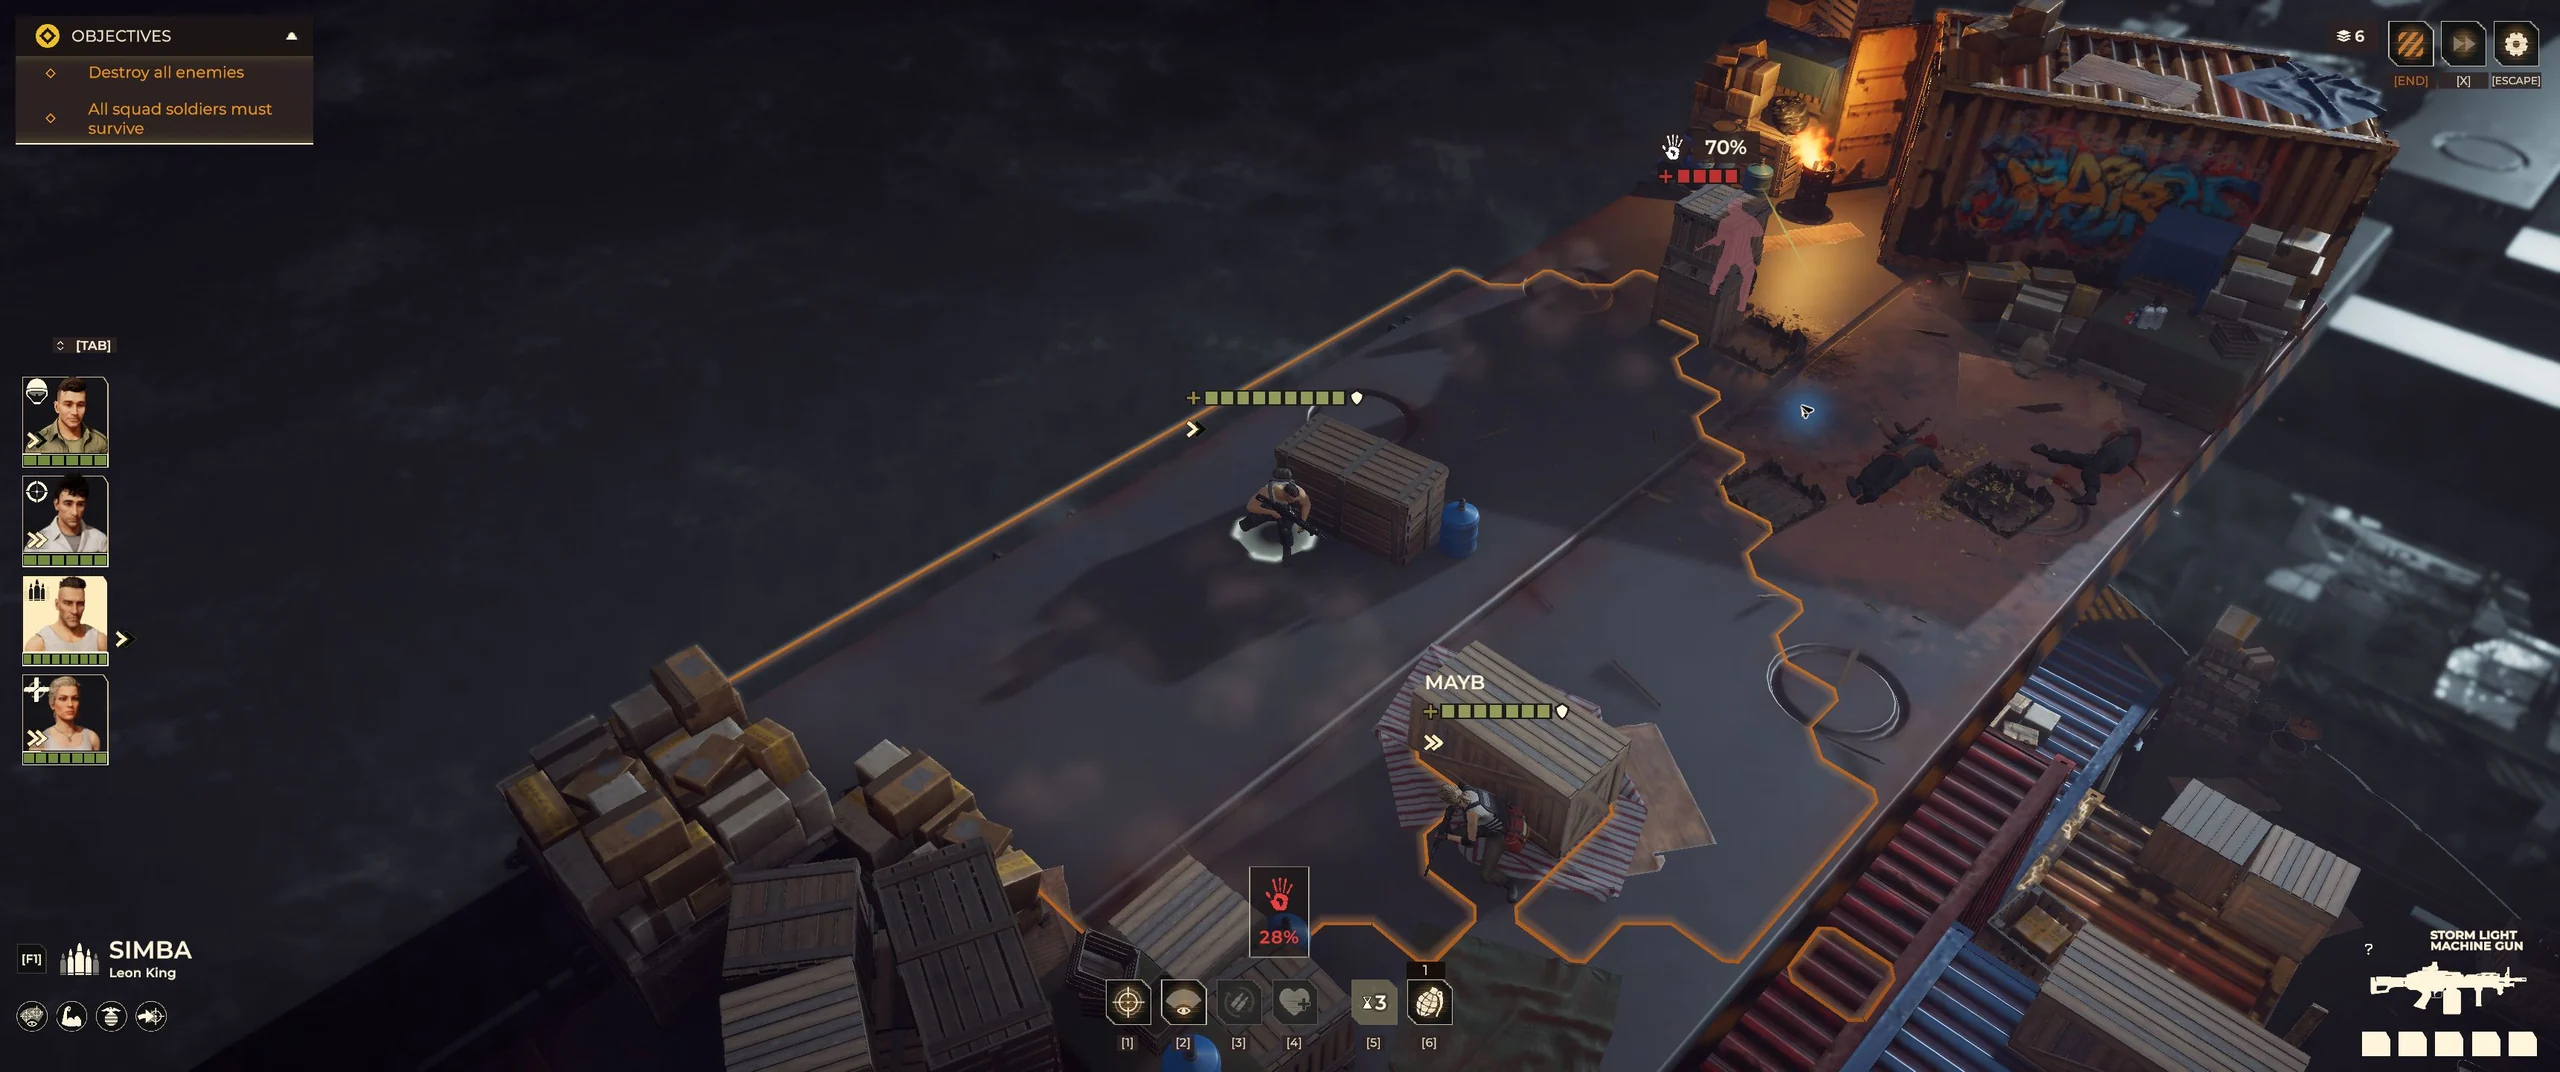
The wooden cover is broken and the two front enemies are down; the rear enemy is still alive. Open for a larger view.
This is one example of breaking wooden cover with Massive Fire, not a guaranteed two-kill attack. Check the preview and plan for enemies who survive. For the weapon values shown in this session, see four weapon stat panels.
Clear the room, then operate the console
After the last enemy falls, check for Destroy all enemies to be greyed out and complete. In our run, a hand marker then appeared over the console. Clearing the room did not finish the ship-hijack objective; we still needed to use the console.
- Check the objective panel for the completed enemy-clear requirement.
- Locate the hand marker over the console inside the room.
- Move an operative to the yellow tile directly in front of it. In this run, simply clicking the floating marker did not trigger it; moving MayB onto the tile did.
- Let the resulting dialogue finish, then confirm the transition to the strategic map.
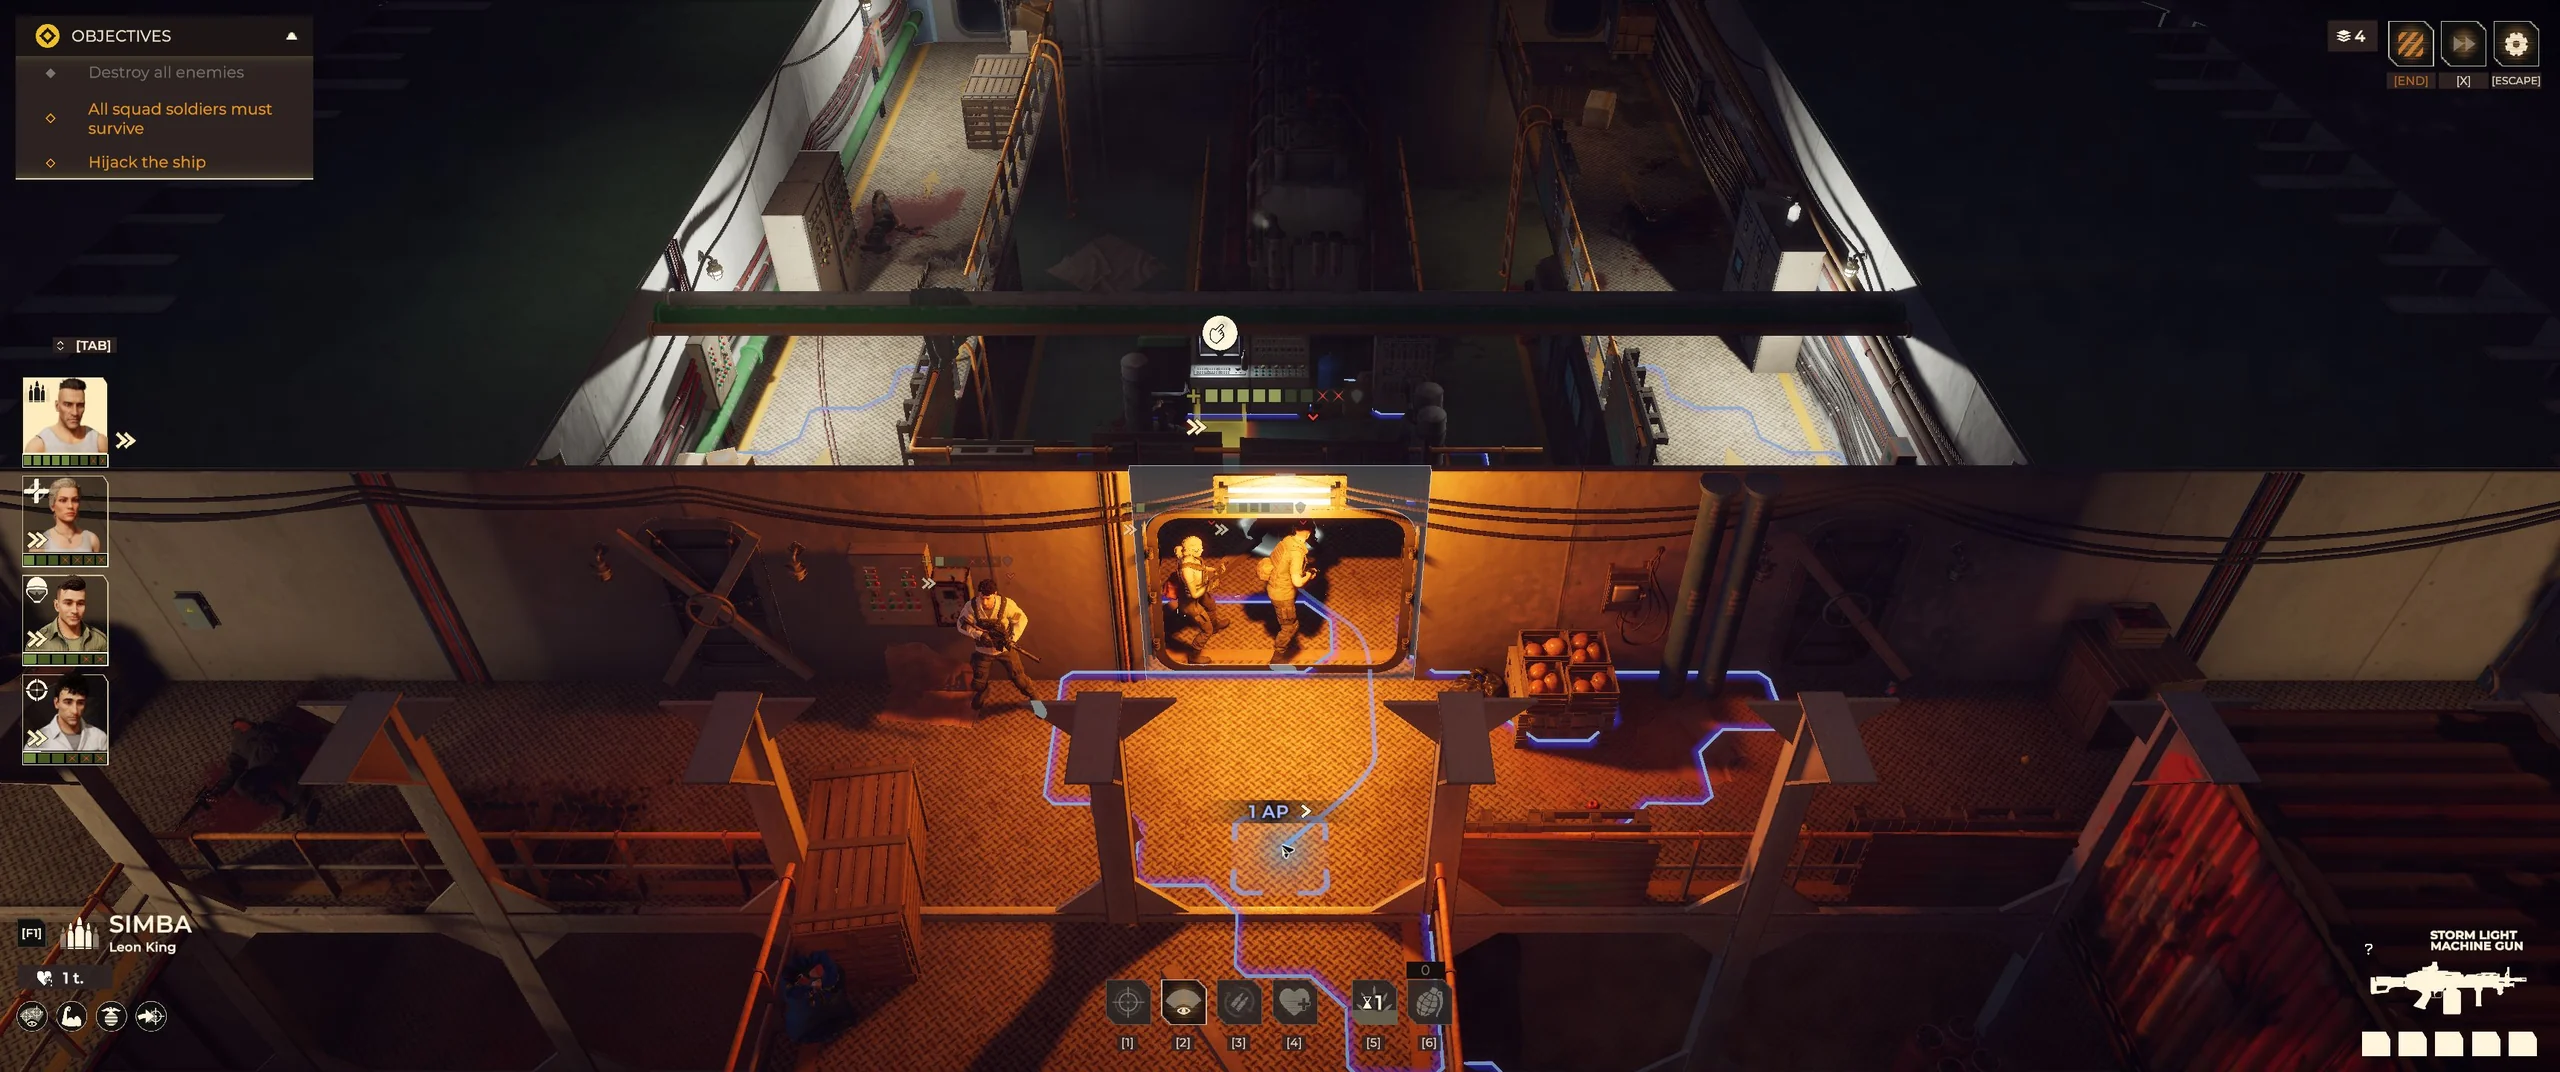
The enemies are defeated, and the hand marker points to the console. Open for a larger view.
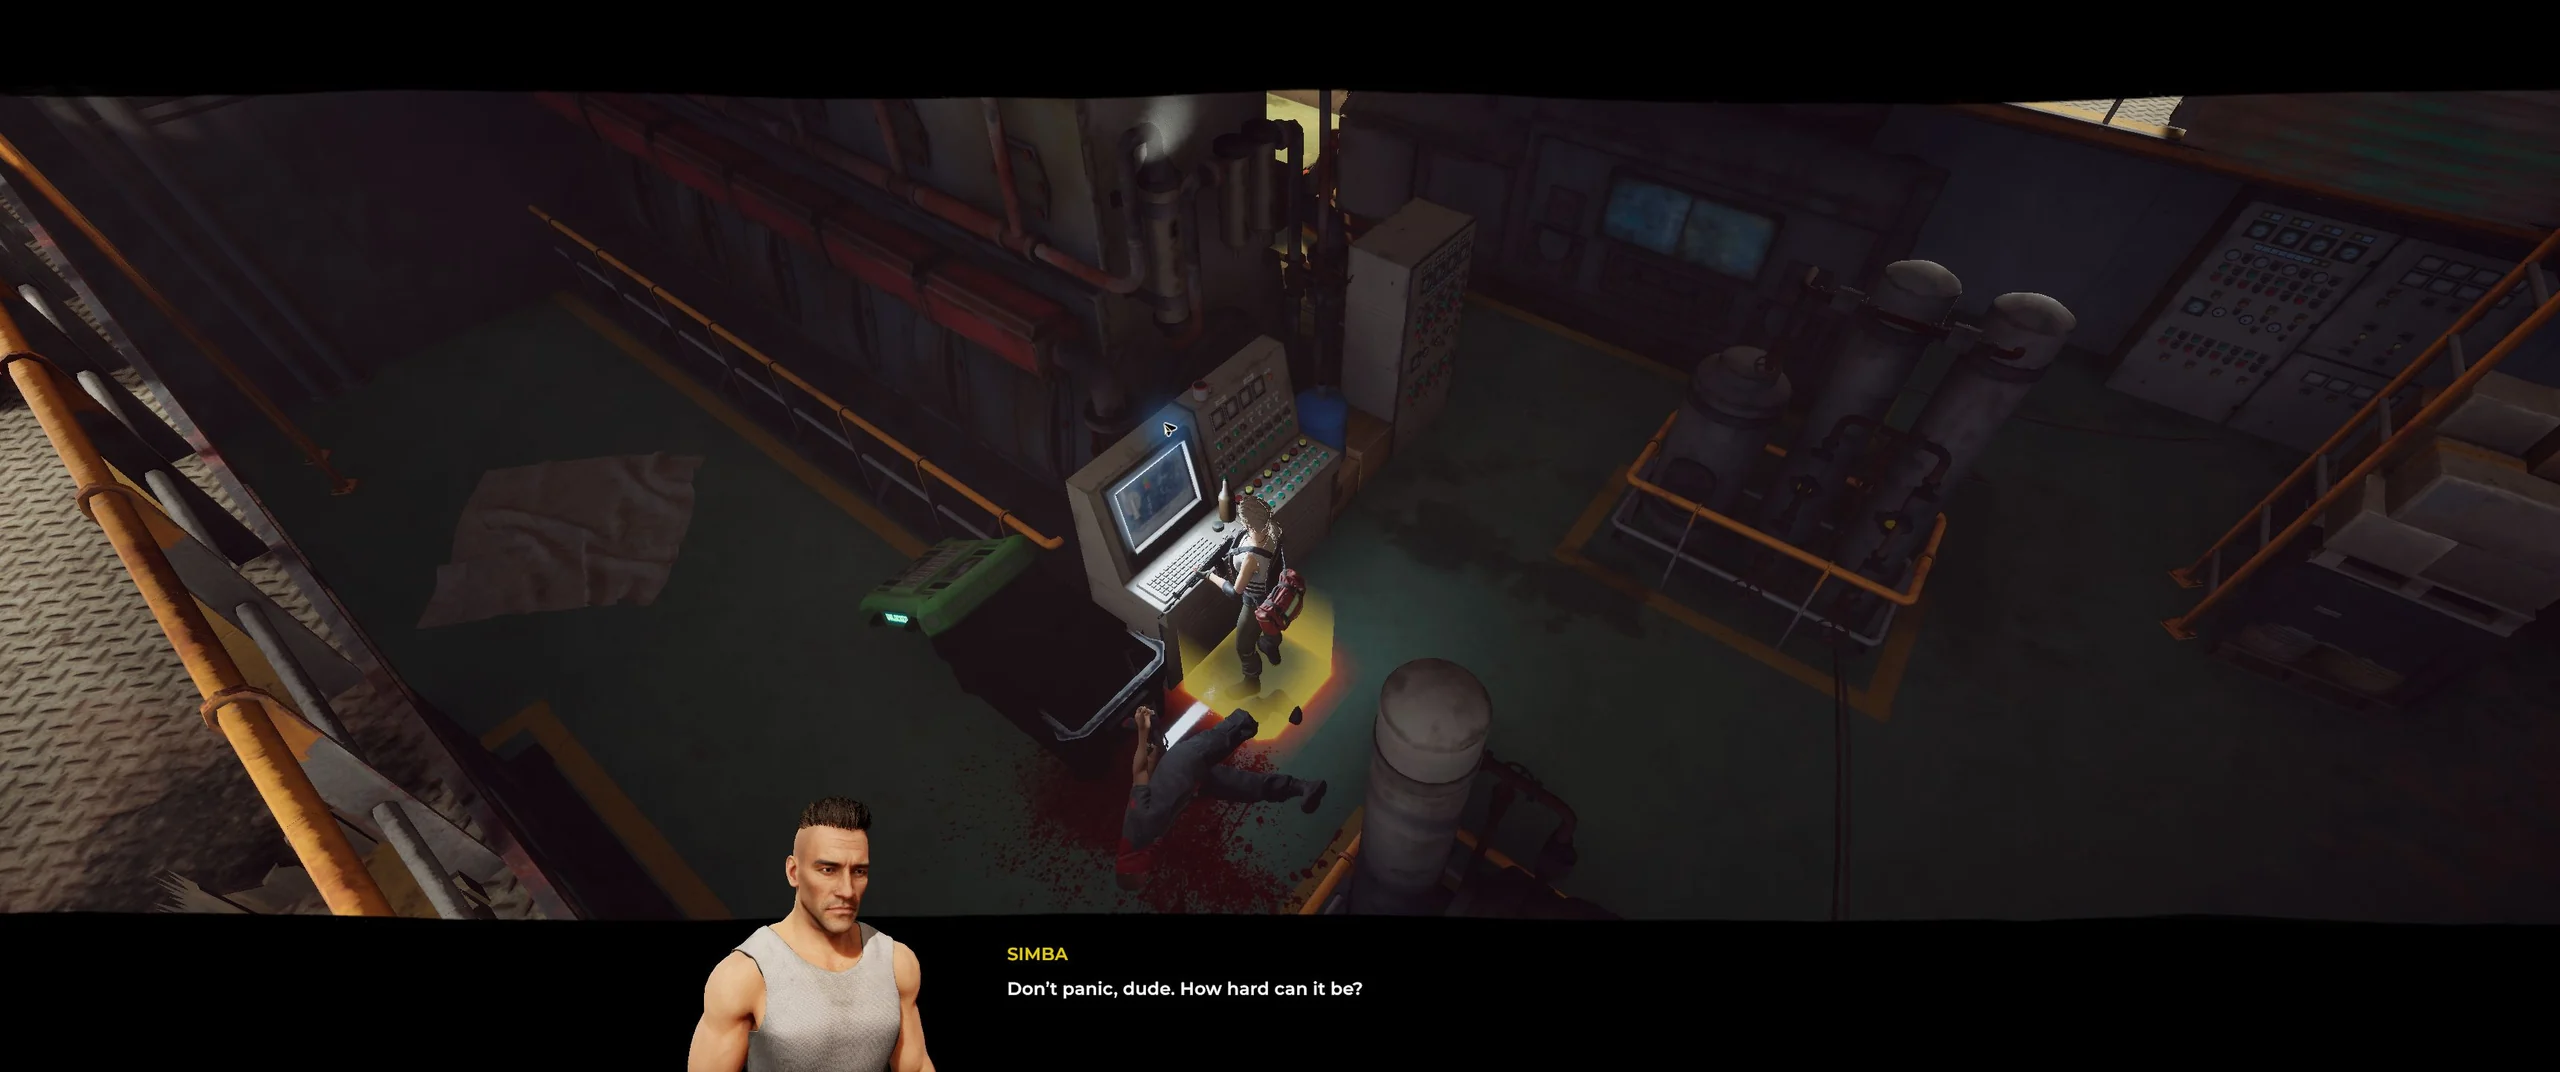
Moving MayB onto the console tile starts the dialogue; Simba is the speaker. Open for a larger view.
We used MayB for this interaction; the guide does not establish a MayB-only requirement. The yellow-tile approach describes this console, rather than every hand marker in the game.
Continue into base management
After the dialogue, our game opened the strategic map with the BASE ship and MAP / BRIDGE / BARRACKS / BASE / HOLD navigation. All four soldiers were in the roster. The balance showed 75,000 funds, but we did not record a reward screen, so that balance should not be treated as the mission payout.
Our next actions were hiring six Rookies, then building Barracks for 10,000 over three days. These are examples from our campaign, rather than a required spending order. See the Rookie class picker when you are ready to assign a class.
For later purchases, continue with the Workshop and Swift drone guide or the Black Market guide.
Version and test notes
The examples were recorded October 23–25, 2026, on SEASONED, English Steam / Windows, BUILD 1.0.22(3313). They cover the late-mission sequence shown here, rather than every encounter. The failed attempt’s final lethal event was not captured, so it does not establish a specific cause or a rule that entering with no AP always fails.
Rescue range and the need for Sprint on other routes remain untested. The no-target screen and Sprint activation were recorded in session notes without separate screenshots. Scripted tutorial transitions also prevent a reliable Massive Fire ammo measurement or a fixed damage total from this example. Screenshots belong to their respective rights holders.
Sources & Verification
- Primary source — currentFirst-hand test: Steel Sails rescue, regroup and consoleWarhounds.org — own gameplay capture · Checked October 25, 2026
- Primary source — currentFirst-hand test: Rookie hiring and Barracks constructionWarhounds.org — own gameplay capture · Checked October 25, 2026
- Primary source — currentFirst-hand Steel Sails weapon tooltips and Massive Fire resultWarhounds.org — own gameplay capture · Checked October 23, 2026